Ina Garten Vegetable Pot Pie (Barefoot Contessa)

IMG_6136

Ina Garten’s Vegetable Pot Pie is great (of course it is!) but the effort is more than a 45 minute prep session.  I have made a few changes to her original recipe.  I added some parsnips.  I skipped asparagus tips and instead added shiitake mushrooms.  I did not use Pernod (it is expensive, not something I keep on hand) and I don’t think the recipes suffers without it.   She recommends making this dish in four individual oven proof dishes.  For simplicity, I used one deep 8 x 8 rectangle baking dish.  I think a normal pyrex will work but you may not have room for all the filling.   If only serving this dish and your guests are hungry, the pie should feed around 4-5 people.

Ina says:   Prep: 45 minutes, Cook 1 hr 35 Minutes, Total Time 2 Hours 45 Minutes

Dishthistoday:  Impossible.  You will need more time for sure.

Prep: @ 85 minutes until the dish went into the oven and I work fast.  With slightly more efficiency, I believe I could have saved an additional 5-10 minutes mostly when cooking the potatoes.  Note I bought pre-prepped fresh squash.  This saved probably 10-15 minutes off the prep time.

In terms of difficulty, the non-pastry piece is time consuming but easy to follow and the filling is delicious.  The pastry portion is also not that difficult assuming you have a LARGE food processor and are used to making dough.

Ingredients

Pot Pie Filling

  • 12 tablespoons unsalted butter (1 1/2 sticks)
  • 2 cups sliced yellow onions (1 1/2 medium/large onions)
  • 1 fennel bulb
    • Remove a small top part of bulb like you would for an onion
    • Remove the stalk portions (not edible)
    • Cut bulb in half and remove the core
    • Slice up the rest of the bulb in thin small pieces
  • 1/2 cup all-purpose flour
  • 2 1/2 cups good chicken stock (use good boxed version)
  • 1 tablespoon Pernod (ok to skip)
  • Pinch saffron threads (best price Trader Joes or Costco Kirkland Brand)
  • 1 1/2 teaspoons kosher salt
  • 1/2 teaspoon freshly ground black pepper
  • 3 tablespoons heavy cream
  • 1 1/2 cups large-diced potatoes (1/2 pound)
  • 1 1/2 cups shiitake mushrooms (vs her asparagus tips)
  • 1 1/2 cups peeled, 3/4-inch-diced carrots (3 carrots)
  • 1 1/2 cups peeled, 3/4 – inch – diced parsnips (2-3 parsnips)
  • 1 1/2 cups peeled, 3/4-inch-diced butternut squash (recommend buying already prepped)
  • 1 1/2 cups frozen small whole onions (1/2 pound)
  • Some frozen peas might make a good addition
  • 1/2 cup minced flat-leaf parsley

For the pastry:

  • 3 cups all-purpose flour
  • 1 1/2 teaspoons kosher salt
  • 1 teaspoon baking powder
  • 1/2 cup vegetable shortening  (half hour prior to making dough – cut into small pieces and put in freezer with butter)
  • 1/4 pound cold unsalted butter, diced (half hour prior to making dough – cut into small pieces and put in freezer with shortening)
  • 1/2 to 2/3 cup ice water
  • 1 egg yolk (she includes the whites) beaten with 1 tablespoon water, for egg wash
  • Flaked sea salt and cracked black pepper

Steps

Pre-Prep the dough so it can be ready when your filling is ready

  • Measuring the dry dough portions and set aside until ready
  • Fill a large glass of water and ice and let the cubes melt so the water is cold.  You can measure the right amount of water later
  • Cut the butter and margarine for the dough and set in a plastic bag and place in the freezer to get cold.

Begin the filling:

  • Fill a large pot of water with salt and start boiling it on medium so it is ready early. This is for potatoes, carrots, and parsnips.  If you have a pot with a fitted insert for things like pasta – use it when cooking these vegetables.  It is faster than fishing out the potato pieces once finished cooking.  I wasted a good five to ten minutes fishing out the potatoes.
  • Prep the potatoes, carrots, parsnips, squash (if you need to) and mushrooms (if using)
  • Cook the potatoes in boiling salted water for 10 minutes. Lift out potatoes and drain
  • NOTE YOU ARE USING THE SAME WATER FOR POTATOES FOR carrots, parsnips and squash (see a few steps lower)
  • Once the potatoes start cooking –
  • Use a very large pan with high straight sides or another large pot for the filling
    • Melt the butter.
    • Add the onions and fennel and saute until translucent, 8 to 13 minutes.  Add mushrooms for 2-4 minutes.
    • Now begin making your pastry dough * *  (you have ten minutes while the potatoes finish and the onions and fennel are cooking.  Make sure to occasionally stir the onions and fennel and add the mushrooms near the end while making the dough)
    • Add the flour, reduce the heat to low, and cook for 3 more minutes, stirring occasionally.
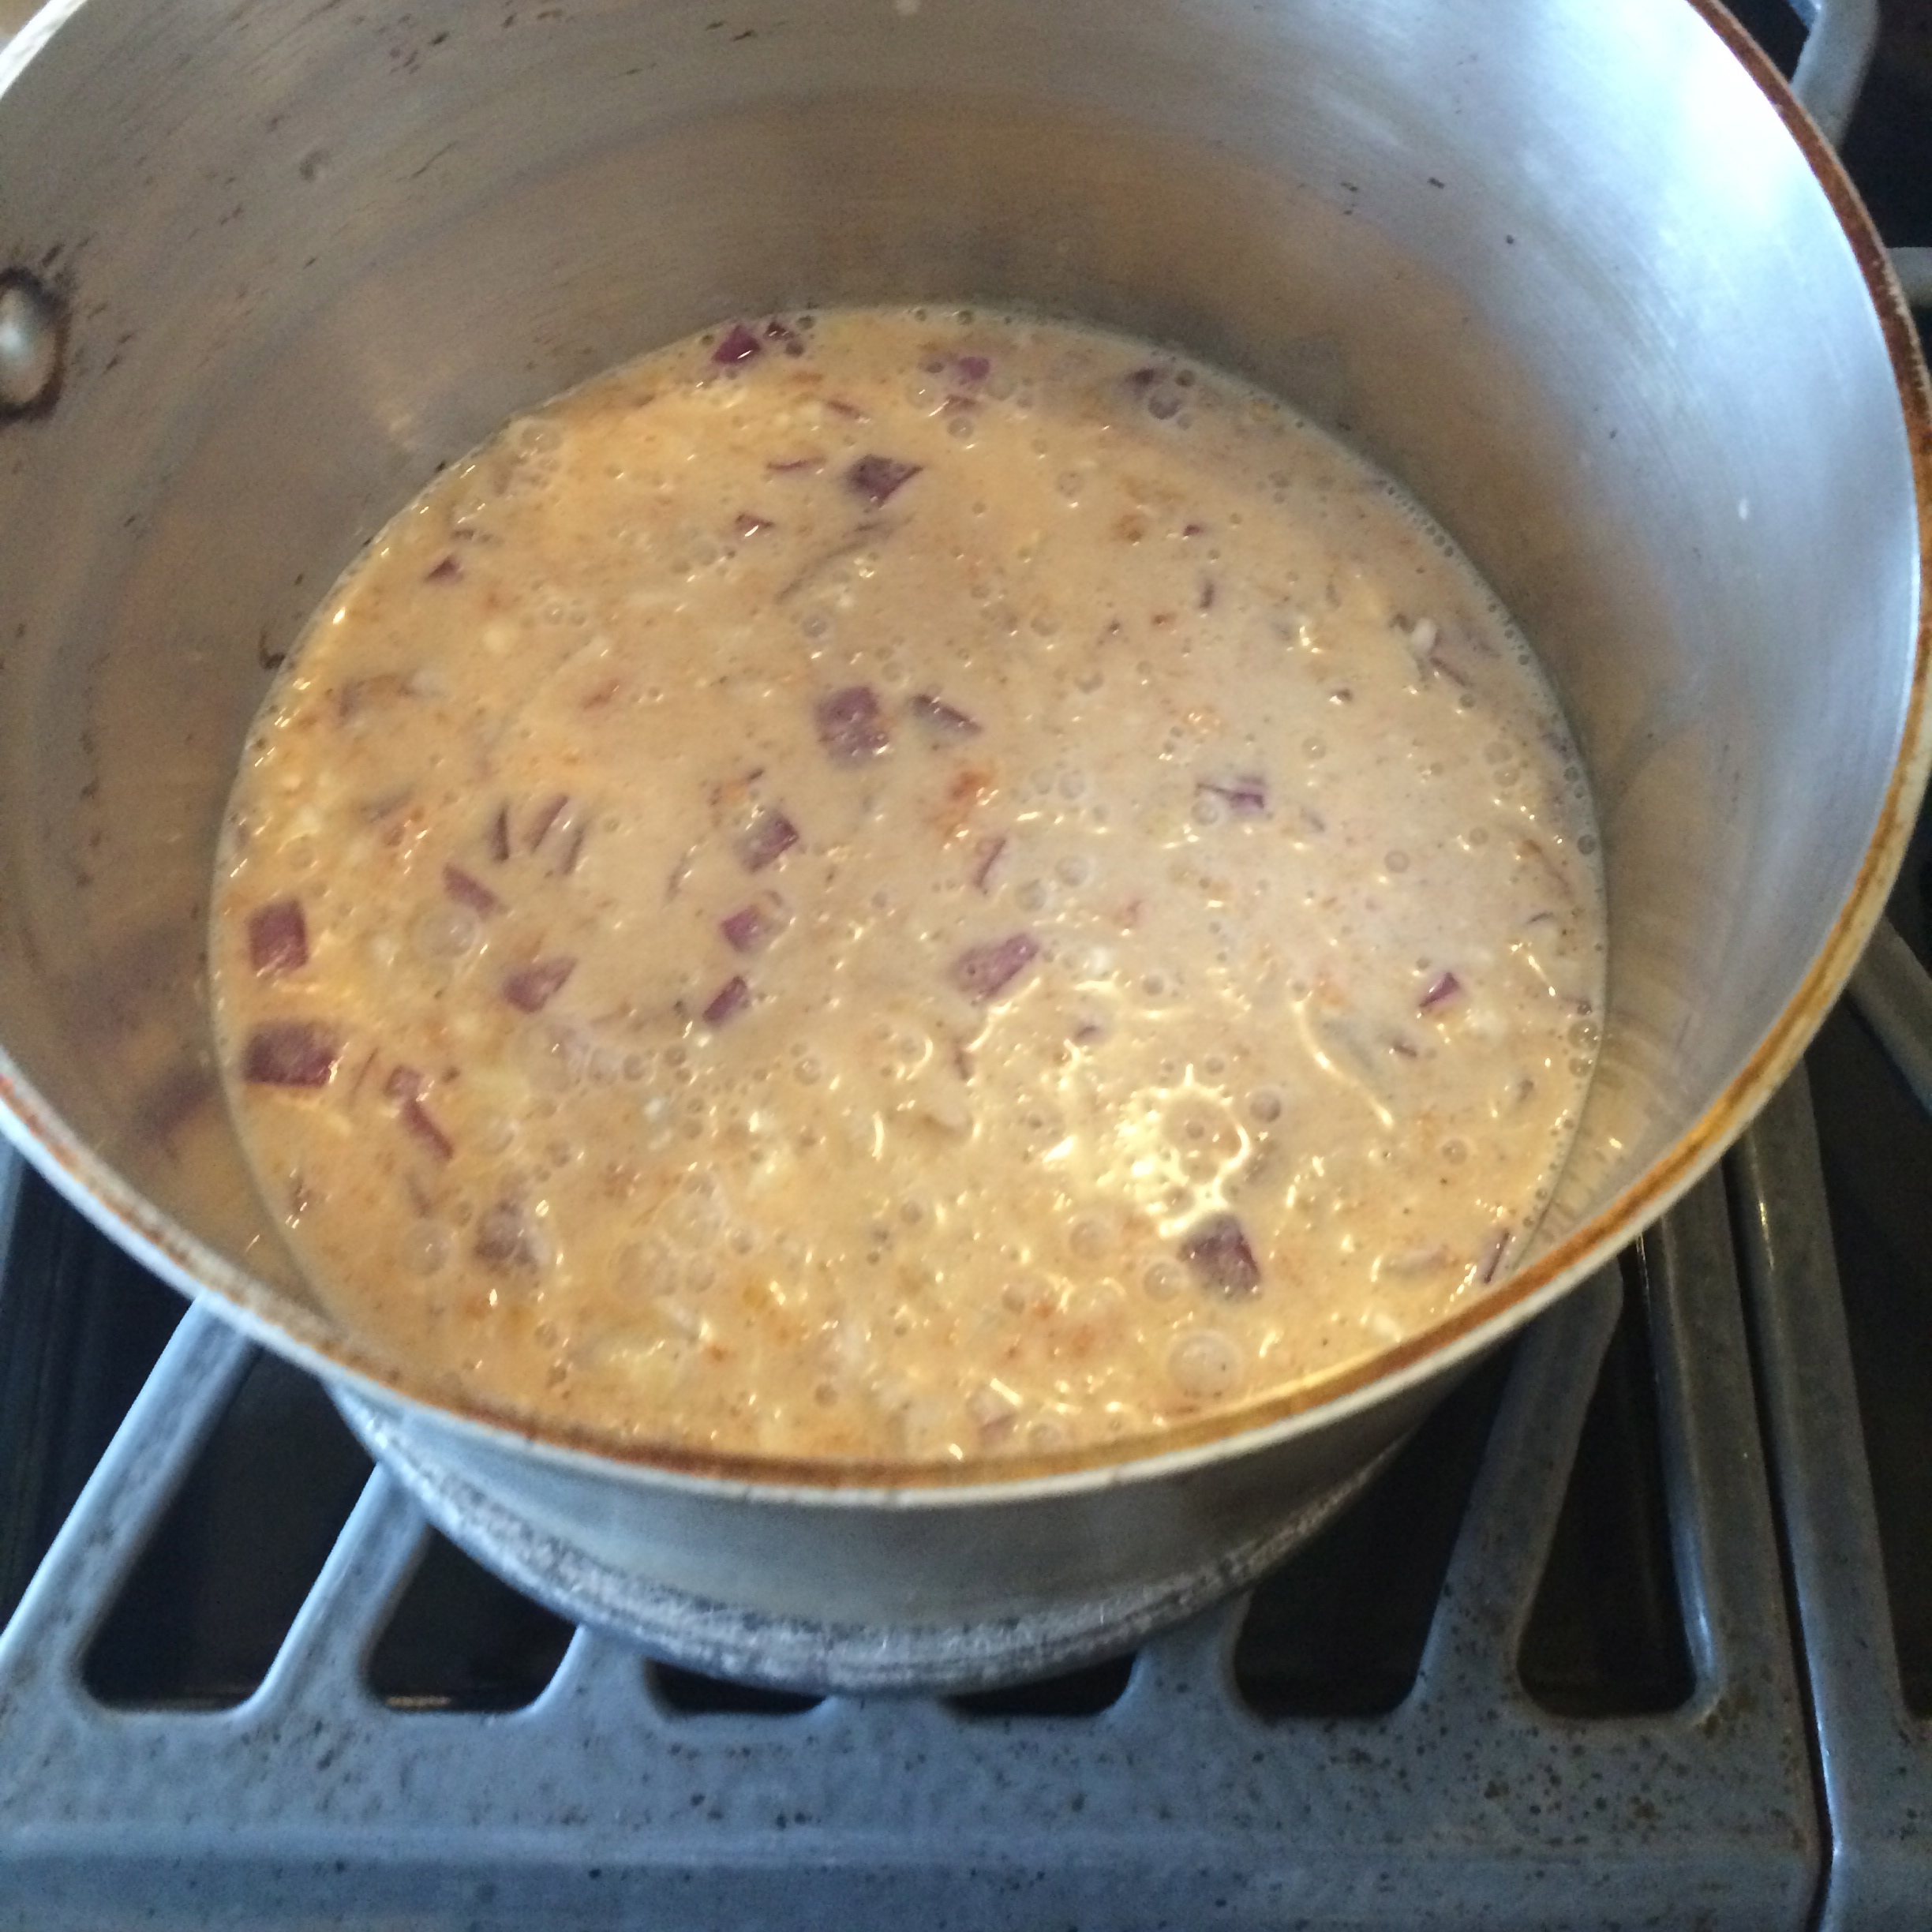
    • Slowly add the stock, Pernod (if using), saffron, salt, and pepper, and bring to a boil. Simmer for 5 more minutes, stirring occasionally.
    • Add the heavy cream and season to taste. The sauce should be highly seasoned.
    • Continuing cooking your vegetables in the water you used for the potatoes as needed
      • Carrots, parsnips, and squash together for five to seven minutes
      • Drain well.
    • Add the potatoes, mixed vegetables, frozen pearl onions, (peas if using) and parsley to the sauce and mix well.

** Making the Pastry Dough

  •  For the pastry, mix the flour, salt, and baking powder in the bowl of a food processor fitted with a metal blade. Add the VERY COLD shortening and butter and mix quickly with your fingers until each piece is coated with flour.
  • Pulse 10-20 times, or until the fat is the size of peas.
  • With the motor running, add the ice water; process only enough to moisten the dough and have it just come together.   This took less than 2 minutes for the ball to form
  • Dump the dough out onto a floured board and knead quickly into a ball.
  • Wrap the dough in plastic and allow it to rest in the refrigerator for 30 minutes.Preheat the oven to 375 degrees F.

Putting it all together …

  • Move the filling to your cooking dish.
  • Brush the outside edges of cooking dish with the egg wash
  • Place the dough on top.
  • Trim 1/2-inch larger
  • Crimp the dough to fold over the sides, pressing it to make it stick with fork
  • Brush the dough with egg wash and make several thin slits in the top (7-10 slits).
  • Sprinkle with sea salt and cracked pepper.

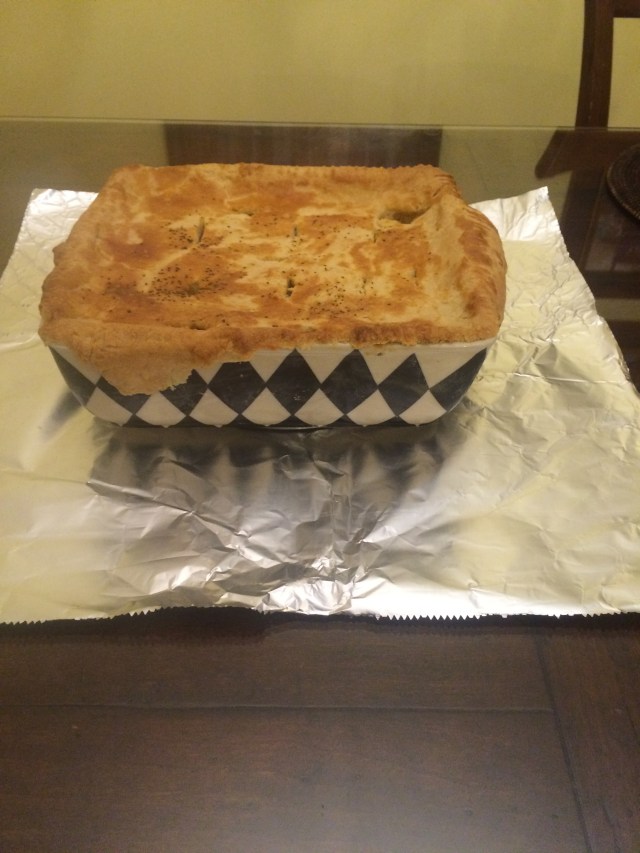
Place on a baking sheet and bake for 1 hour (60 minutes), or until the top is golden brown and the filling is bubbling hot.

Getting ready

Leek Prep (whole leek, slice off top and bottom, slice in half and remove rough core, then diced)

Making the filling

Dough before adding water; dough ball, dough rolled out

Drained cooked vegetables

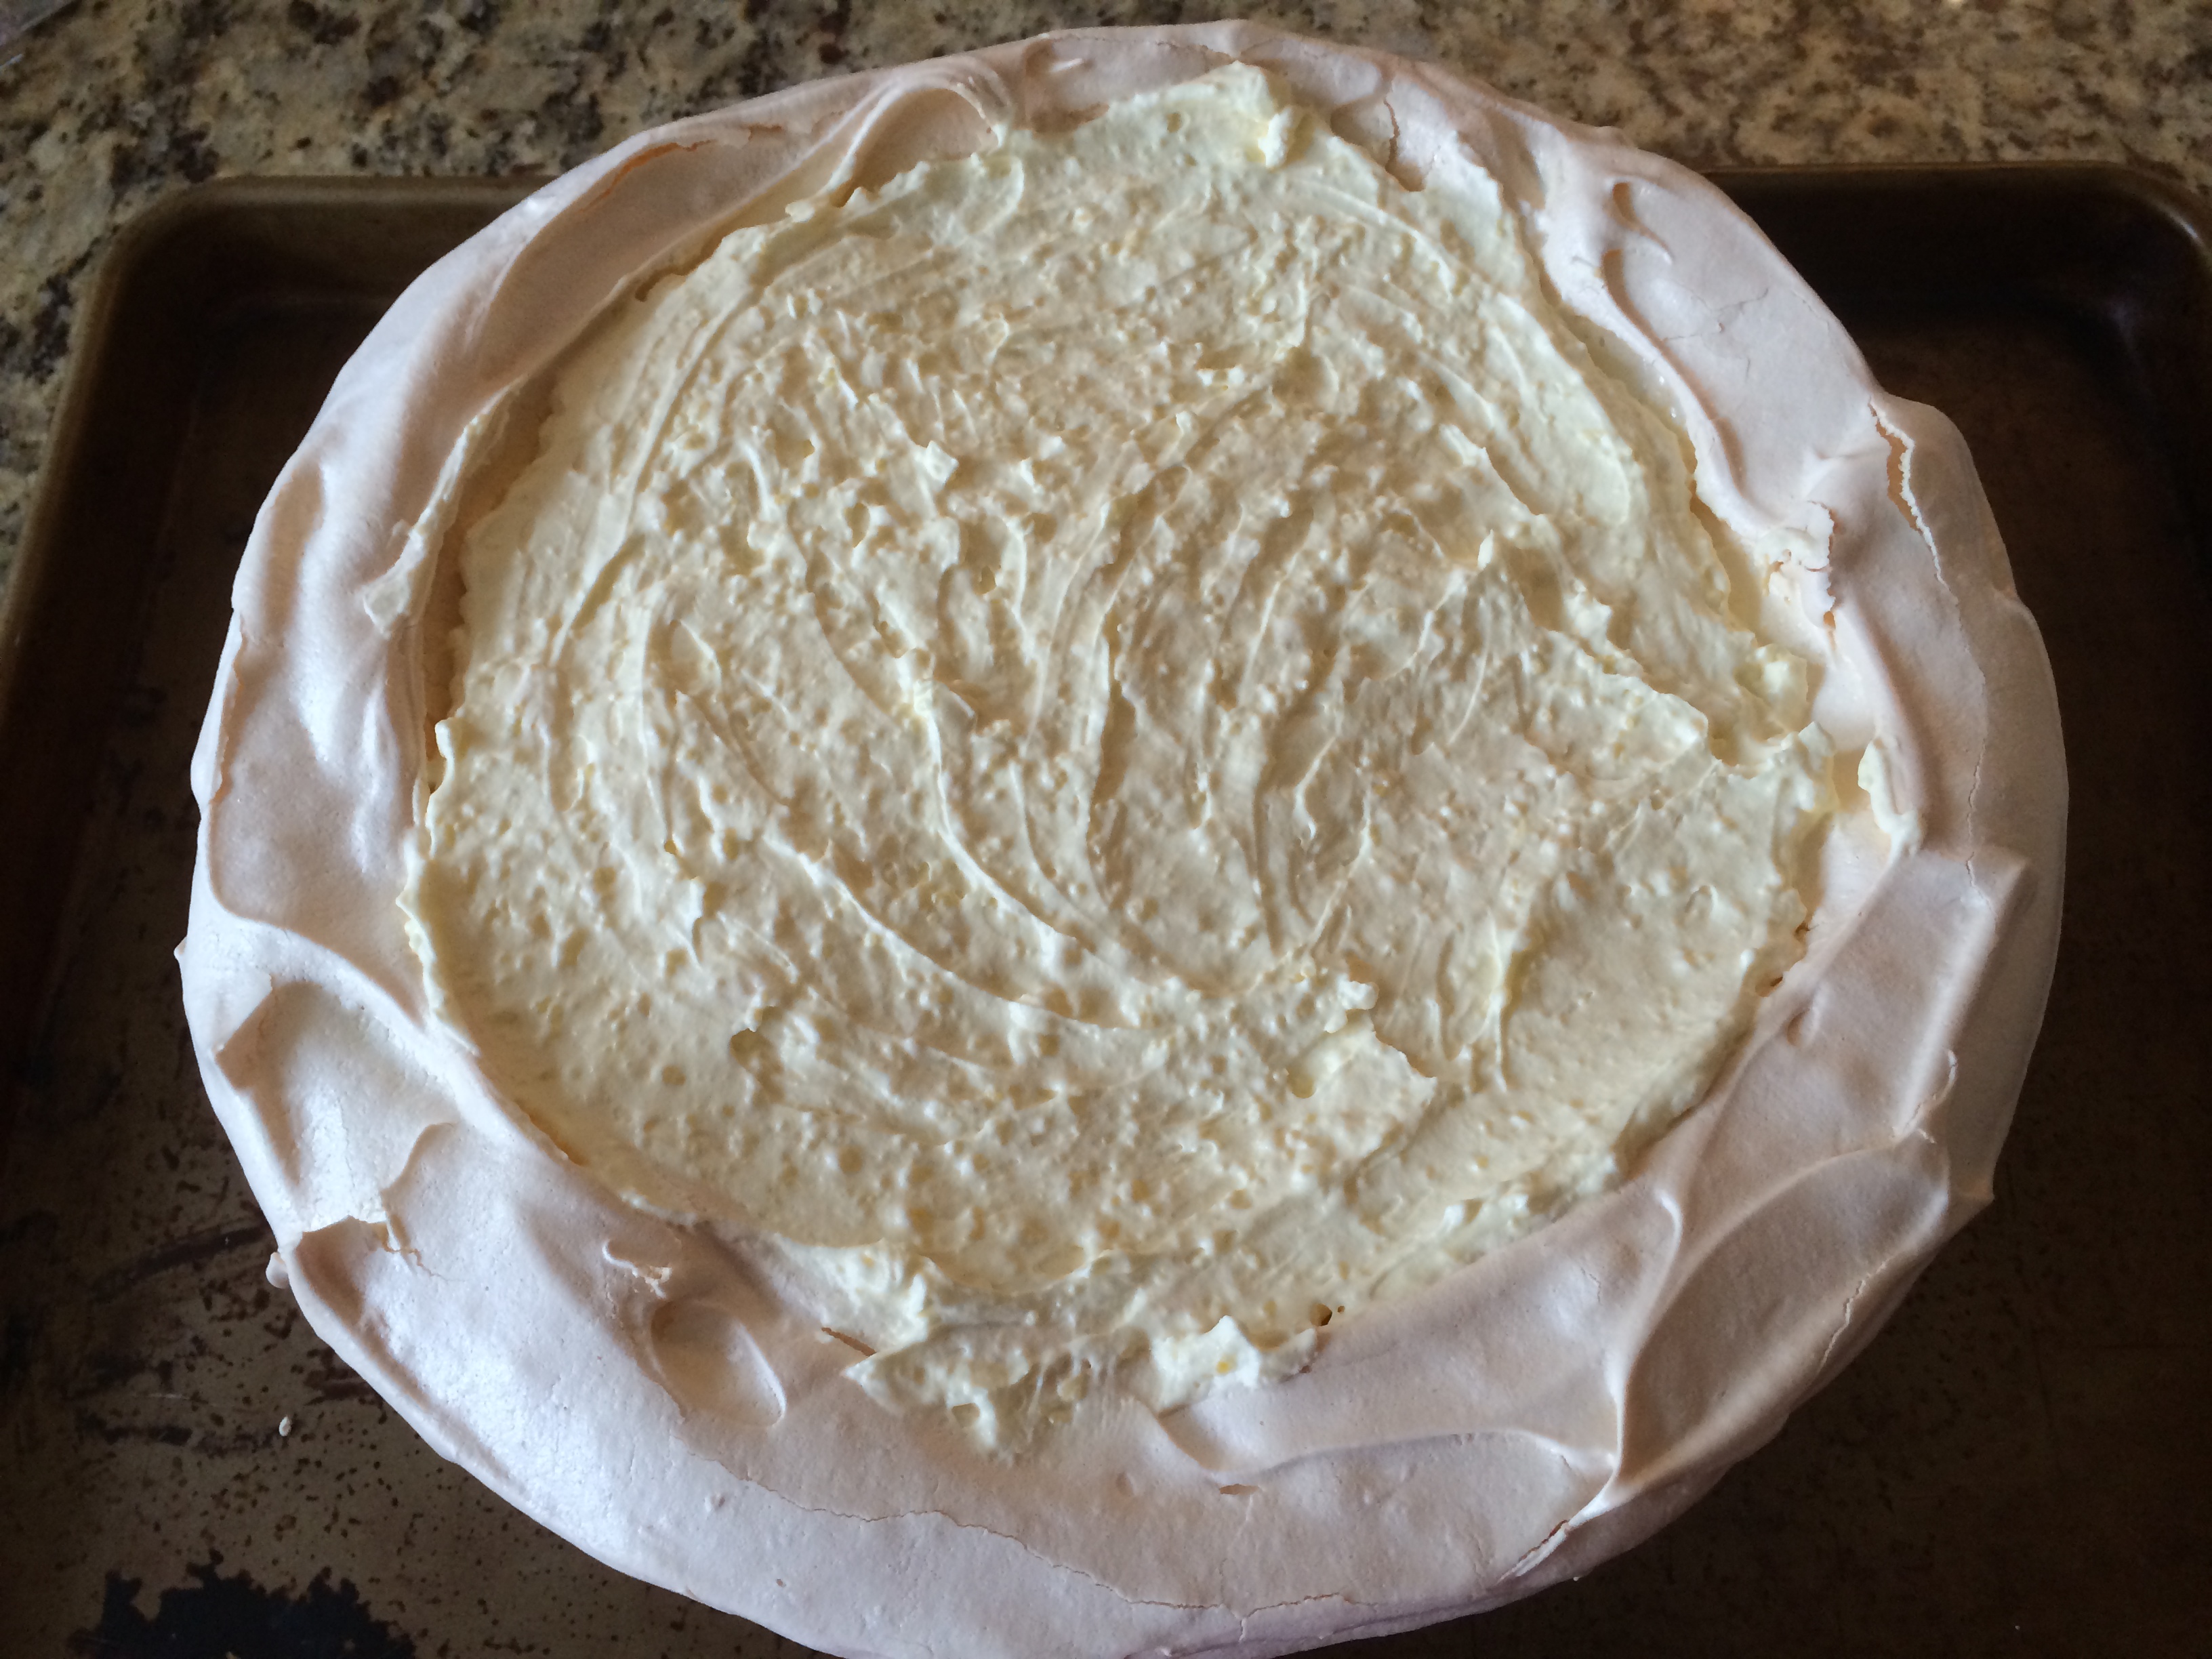
Pie before oven and after being cooked
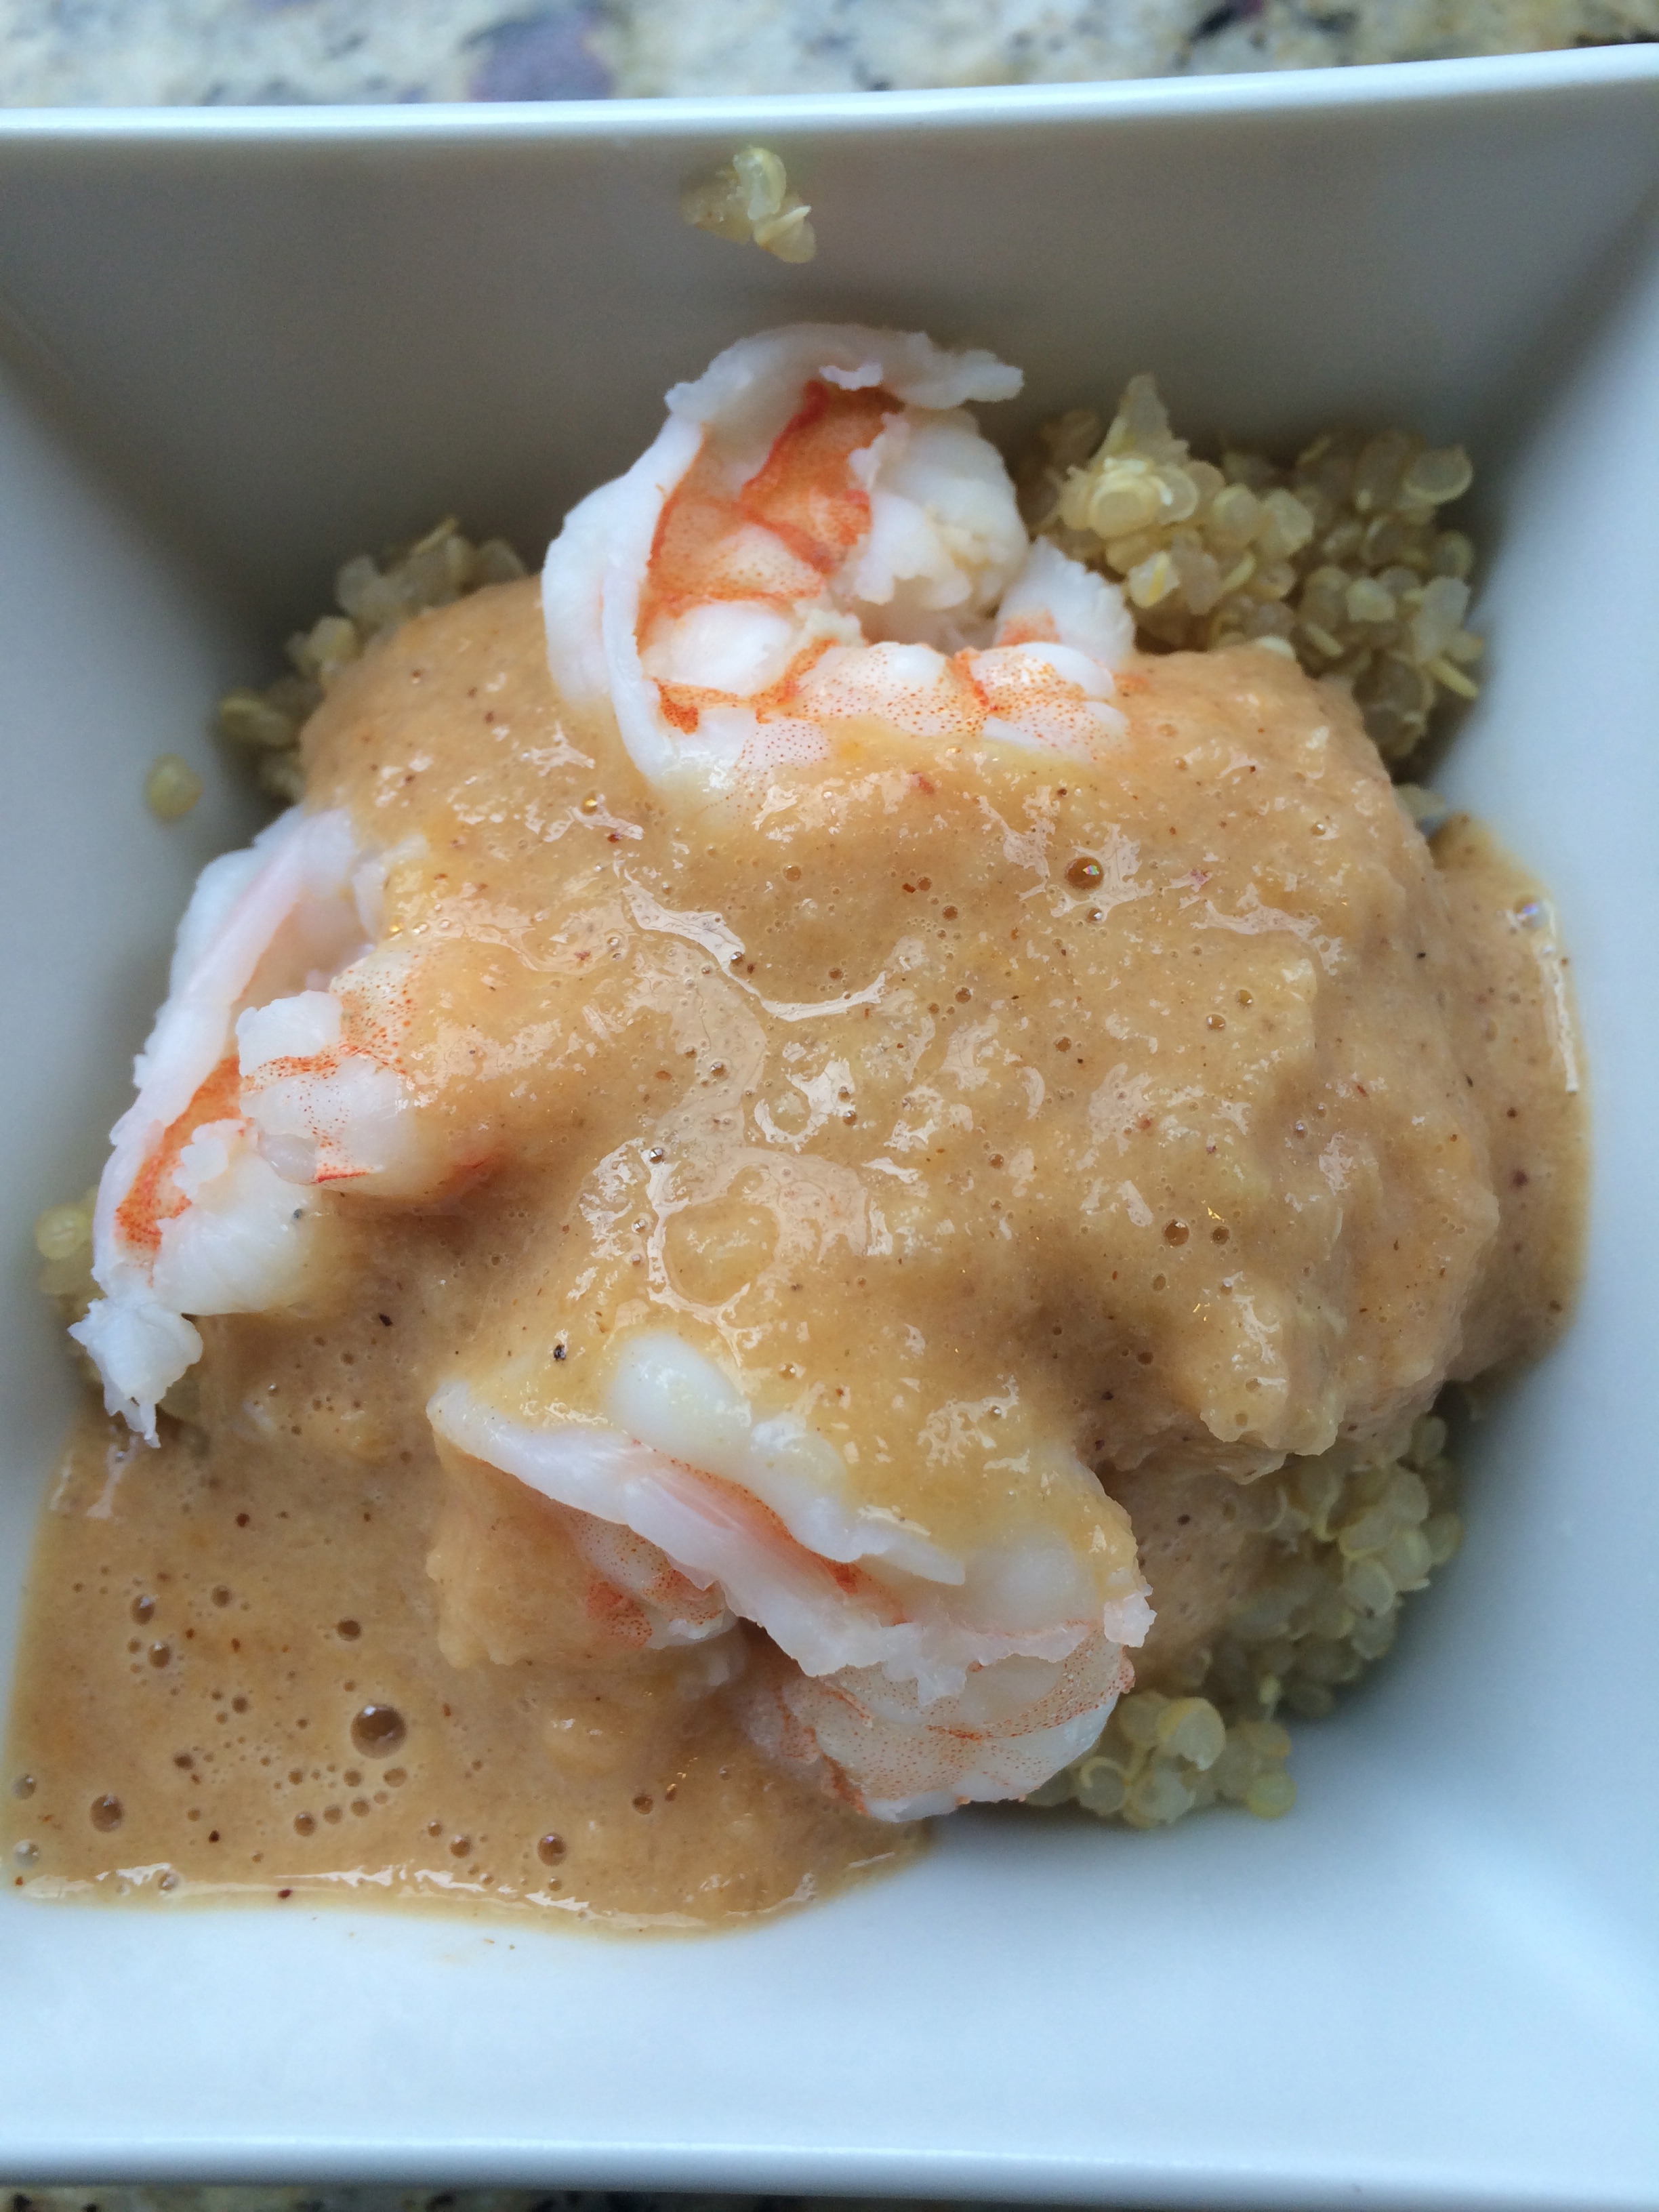
Piece up close

IMG_6140


Original Recipe:

http://www.foodnetwork.com/recipes/ina-garten/vegetable-pot-pie-recipe.html


Advertisement

Aunt Norsey’s Light as a Cloud Lemon Meringue Pie Recipe and a Bonus Meringue Cookie Recipe

This is my Aunt Norsey’s Recipe that I have now been making for years thanks to her excellent coaching.  The pie is a bit of effort (I can’t lie), but the taste is a unique combination for lemon meringue pie that is worth experiencing.   Please post any questions or comments.  I tried to elaborate as much as possible for each major step.

Norsey’s Lemon Meringue Pie – Last Updated 10/5/2014

Use 10 inch high sided pie plate

Lemon Meringue Crust Ingredients

  • 8 Egg Whites *
    • Make sure eggs are room temperature before starting and no shells
    • Have a few extra on hand if an egg does not separate properly
  • Pinch of Salt
  • Half of Teaspoon Cream of Tartar
  • 2 Cups of Sugar
  • Butter (for buttering pie plate)

Lemon Meringue Crust Preparation

Preheat oven to 275

  • Using whisk beater, beat eggs whites alone (around 3 minutes) with a pinch of salt and cream of tarter until approaching “stiff peaks.” (moving speed up gradually to level 6 on kitchen-aid mixer).
  • Add 2 cups of sugar to egg whites, a little at a time and continue beating until mixture is glossy and sugar is dissolved . Beat this stage at least 4-5 minutes moving from level 6 to 8 (medium high to high speed).
  • Remove from mixer stand and spread meringue in a well buttered 10 inch pie plate with deep sides. Carry out the meringue out until the rim (but not over the edge). Should have an inch on bottom of plate and then on the sides create a high outside ring of meringue.   There will be a fair amount of meringue left over to bake cookies separately! See a suggested recipe at end.
  • Lay pie pan on cookie sheet and bake the crust 275 heat for about 50 minutes or until very faint tinge has appeared. Crust should feel hard.
  • Remove from oven. Allow to cool. Store shell in a cool place with clean dish towel over it.   Crust can sit overnight and rest of pie can be prepared early next day.  If so, just cover the egg yolks and place in fridge until ready to use.

Lemon Filling Ingredients

  • 8 Egg Yolks
  • 1 Cup of Sugar
  • ½ Cup lemon juice (around 3 lemons)
  • Rind of 2 lemons grated
  • 2 pints of heavy cream (can do with only 3 cups if need be)
    • One pint for lemon filling below; other pint for whip-cream step
  • 2 tsp unflavored gelatin (about 1 packet of Knox brand)

Lemon Filling Preparation

  • Beat egg yolks until thick using flat mixer beater (up to a medium speed).
  • Add sugar and lemon juice until blended. Remove bowl from mixer.
  • Add rind by hand.
  • Stir and cook in double boiler until the mixture thickens some. Use a whisk or spoon for this.   Want to do this over low to low/medium heat, not boiling. Usually takes around 10-20 minutes for mixture to become thick. Remove from stove.
  • While mixture is heating above drop some ice cubes into cold water.   Measure a ¼ cup of ice cold water and add the gelatin as your lemon mixture is near completion on stove.
  • Add gelatin water to cooked filling.
  • Put mixture into fridge COVERED to cool for 60 minutes. At the same time put the bowl you are mixing the whip cream and the whisk beater in the fridge to get cold. Stir with whisk the lemon mixture when you remove from fridge. If too thick reheat some on stove. You do not want the mixture warm or watery before adding cream.
  • Whip 2 cups heavy cream with whisk beater. Fold into cooled lemon filling . Fold in a quarter (1/4th) at a time.
  • Spoon into meringue crust.

Whip Cream Pie Topping: Ingredients and Preparation

  • Whip second pint (or less if you want to go light on the whip cream). Add:
    • 1 teaspoon of vanilla
    • 1 -2 teaspoons of sugar
    • Whip some more
  • Spread whip cream around the edges of the pie and in the middle to decorate.
  • Put pie in fridge overnight if possible.

Recommend waiting at least a few hours to add the whip cream and cut the pie. The more time in the fridge the better. Less than 3-4 hours, the pie will be difficult to cut.


* Separating Eggs

  • Tip set out 2 bowls one to collect yolks, one to collect whites
  • Crack and separate each egg white separately into third bowl and only add to whites bowl one at a time assuring no yolks or shells get into the egg white bowl.

IMG_8047

8 egg whites and egg yolks separated (above)


Pictures for making the crust (below)

IMG_8051

Texture of whites before adding sugar (above)

IMG_8056

Texture of whites when finished and ready for pie plate (above)

IMG_8057

Pie plate (above)

IMG_8060

Meringue spread into pie plate.  Notice crust is a good inch plus above the center of the pie (above)

IMG_8063

Sense of amount of leftover meringue (above)

IMG_8067

Cooked crust (above). Notice tinge.


Pictures for making the lemon filling (below):

IMG_8074

Grated lemon rind (above)

IMG_8076

Mixture just set on double boiler on stove (above)

IMG_8087

Texture of mixture after 15 minutes (above). Notice thicker consistency.

IMG_8089

Texture of whip cream to be folded into lemon mixture (above)

IMG_8090

Cooked lemon waiting for whip cream to be folded into it (above)

IMG_8091

Filling with whip cream folded in (above)

IMG_8092

Crust with filling added.  Now ready for fridge for a few hours (above)


OLYMPUS DIGITAL CAMERA


IMG_3983.JPG

Meringue Cookie Recipe

Preheat oven to 350, making sure the oven is nice and hot

Add chocolate chips to cookies if desired

Scoop leftover meringue on cookie sheet lined with parchment paper

Use a finger to push the meringue off the spoon

Turn off the oven

Place the cookies into the off oven and leave for 8-12 hours

Seal in a airtight container or zip lock bag


IMG_8064

Uncooked (above)

IMG_8071

Cooked (above).  Hard to see but cookies are now crisp.


Upscale Pigs in the Blanket (Chicken Sausage-Cranberry Pigs-in-Blankets)

IMG_7907

I found this recipe in a mini appetizer book.  It is an upscale mini hot dog with a nice blend of sweet and tangy flavors.  It is always well received.  Kids can help make them in the kitchen.  This recipe can easily be doubled and leftovers can be frozen.  If I know I will be freezing portions to be reheated later I slightly undercook.   Often I need to make this recipe without the nuts because of nut allergies.  I personally think the recipe is more tasty with the almond slivers but it is certainly still good without nuts.  Exact measurements are not required.  Prep time for a double recipe is about 20 minutes using a Cuisinart.  Cleanup is very easy especially if you throw your Cuisinart pieces in the dishwasher.  Cooking time is 20 minutes.  Make sure you allow 30-40 to thaw your dough.  Do not prematurely pull out the dough from the freezer.  If the dough gets too soft, making the hot dogs will become difficult.

Ingredients for 1 batch:  Yields 25-30 mini dogs

1/3rd cup dried cranberries

1/2 cup fresh parsley leaves – do not substitute dry

1/4 cup slivered almonds

1/4 cup grated Gruyere Cheese

1 teaspoon whole-grain or creamy dijon mustard (if I am doubling the recipe I use one heaping teaspoon of each)

1 sheet frozen puff pastry, thawed

2-3 links PRE-COOKED apple flavored (or other) chicken sausage.  The package I show requires just two links given the thickness of the links.


Directions:

Defrost Pastry Dough (allow 30-40 minutes).  Open box.  Set on counter.  Do not try to unroll dough until fully defrosted.

Combine cranberries, parsley, almonds, cheese, and mustard in a food processor fired with a metal blade and process to coarse paste.  It takes about 30-60 seconds.

Place pastry dough on work surface (cutting board works well).   Cut into 3 long strips (10 inches) and then 8-10 approximately 1 inch cuts across.

Cut sausage links in half lengthwise and then cut each link 5-7 slices the other direction depending on the brand.

Preheat oven to 400 degrees F.

Prepare a small bowl of warm water and set aside.

Press about a half teaspoon cranberry mixture onto center of each pastry strip, leaving the sides empty of paste.

Top each with piece of sausage.

Slightly wet the sides of each strip (using your water bowl).

Bring the ends together up and over the sausage.  Press firmly to seal and place on a non-stick baking sheet (I usually lay some parchment down or spray some cooking spray but neither step is necessary).

Do not crowd dogs and bake for 20 minutes if serving right away or 18 minutes if freezing for later cooking.  The pastry at either time should be baked through but at 20 minutes the dough will be a slightly darker color.

Serve piping hot with additional mustard.

IMG_7894


Sausage – notice words at bottom fully cooked.  I did remove the small amount of casing.  Not not all precooked sausage has a casing film.

IMG_7896


Parsley, Cheese, Cranberry Paste

IMG_7899


IMG_7900 IMG_7901

Prepping Pastry

IMG_7903

Prepping Dogs

IMG_7904

Preparing the Dogs

IMG_7906

Precooked

IMG_7909

Cooked cooling on a baking rack


Ina Garten’s / Barefoot Contessa Company Pot Roast

IMG_7879

Tips:

If you are looking for a pot roast and have about a half hour to invest in preparation, Ina’s version is delicious.  Her directions list 20 minutes of prep time.  That is too short to clean and dice all items and sear your meat.  Total cooking time is about 3 1/2 hours, in addition to the 30 minutes of prep.  If you are not serving right away leave the completed stew in a slow cooker on warm setting.  Freeze in small portion any leftovers.  I made this entire dish in my Williams-Sonoma All-Clad Deluxe Slow Cooker (with Cast-Aluminum Insert 7 quart) even though the dish was not cooked in a slow cooker manner. This slow cooker can sear your meat on the stove top and then go into the oven.    I made one addition.  I added diced potatoes after 90 minutes of initial cooking at the higher temperature.  I made one deletion, skipping the Cognac because we did not have any.  The sauce has such a complete taste,  I am not sure it matters.   Note: I did use most of the amount of salt and pepper recommended despite seeming high.  I would not drop the amounts below much,  unless salt intake must be closely watched.  The dish once done is not salty nor too peppery.  I do not have a sense for how many servings this dish made because we froze a lot.  My best guess would be there is enough for 8-10 people easily.

Ingredients:

1 (4 to 5-pound*) prime boneless beef chuck roast, tied  (I cooked mine untied)

* I also used two ” 2  1/2 ” pound pieces given one large option was not available

Kosher salt and freshly ground black pepper
All-purpose flour
Good olive oil
2 cups chopped carrots (4-5 carrots)
2 cups chopped yellow onions (2 small onions or 1 large)
2 cups chopped celery (4 stalks)
2 cups chopped leeks, white and light green parts (2 to 4 leeks)

4 small white potatoes cleaned and diced (peeling not necessary)
5 large garlic cloves, peeled and crushed
2 cups good red wine
2 tablespoons Cognac or brandy (I skipped)
1 (28-ounce) can whole plum tomatoes in puree
1 cup chicken stock
1 chicken bouillon cube
3 branches fresh thyme **
2 branches fresh rosemary **
1 tablespoon unsalted butter, at room temperature

**I used a combo herb packet for roasting a chicken which had a total of 4 herbs

Directions:
Preheat the oven to 325 degrees F.

Pat the beef dry with a paper towel. Season the roast all over with 1 tablespoon salt and 1 1/2 teaspoons pepper. Dredge the whole roast in flour, including the ends. In a large Dutch oven (I used my slow cooker), heat 2 tablespoons olive oil over medium heat. Add the roast and sear for 4 to 5 minutes, until nicely browned. Turn and sear the other side and then turn and sear the ends. This should take 4 to 5 minutes for each side. Remove the roast to a large plate.  If you are using 2 smaller pieces you likely will only need to sear on 2 sides not 4.
Add 2 tablespoons olive oil to the Dutch oven. Add the carrots, onions, celery, leeks, garlic, 1 tablespoon salt, and 1 1/2 teaspoons pepper and cook over medium heat for 10 to 15 minutes, stirring occasionally, until tender but not browned. Add the wine and Cognac (if using) and bring to a boil. Add the tomatoes, chicken stock, bouillon cube, 2 teaspoons salt, and 1 teaspoon pepper. Tie the thyme and rosemary together with kitchen string and add to the pot.

Put the roast back into the pot, bring to a boil, and cover.

IMG_7861

(Picture before being covered and placed into oven)

Place in the oven for 2 1/2 hours (if using potatoes add after 90 minutes and return meat to oven for another 1 hour at 325), until the meat is fork tender or about 160 degrees F internally. Turn the heat down to 250 degrees F for about an hour to keep the sauce at a simmer.

Remove the roast to a cutting board. Remove the herb bundle and discard. Skim off as much fat as possible from the sauce. Transfer half the sauce and vegetables to a blender or a food processor fitted with the steel blade and puree until smooth. Pour the puree back into the pot, place on the stovetop over low heat, and return the sauce to a simmer. Place 2 tablespoons flour and the butter in a small bowl and mash them together with a fork. Stir into the sauce and simmer for 2 minutes, stirring until thickened. Taste for seasonings. Remove the strings from the roast (if not already done so), and slice the meat. Serve warm with the sauce spooned over it.

Other Photos

IMG_7857

Meat seasoned but raw above

IMG_7858

Meat seared above

IMG_7856

Raw vegetables diced excluding potatoes above


IMG_7860

Fresh herbs tied with kitchen string above

IMG_7859

Vegetables (excluding potatoes) tender not browned (above)

Read more at: http://www.foodnetwork.com/recipes/ina-garten/company-pot-roast-recipe.print.html?oc=linkback


Giada De Laurentiis’ Turkey Chili Served with Quinoa

Image

I was on an airplane ride returning from vacation with free TV and Giada from the Food Network made this recipe.  It sounded good so we tried it out.  It got the thumbs up from me, my husband, and our young daughter.  It is definitely flavorful, easy to make, and can be on your table in under an hour including cleanup especially with some quick advanced planning.  Her web link says prep is 1 hour, cook 1 hr 30 minutes.  You likely will not need this much time.  This dish listed below does not have much “heat”.  If you want more keep some chili seeds in and use more chili powder.

http://www.foodnetwork.com/recipes/giada-de-laurentiis/california-turkey-chili-recipe.print.html

Serves 6-8 large bowls

(This recipe has been grossed up from the web link.)

Ingredients

1/3 cup extra-virgin olive oil
4-6 large cloves garlic, smashed, peeled and chopped  (short cut pop the peeled cloves in a small cuisinart, or just use jar garlic)
1-2 large poblano chiles, stemmed, seeded and diced (I used one large; she lists two)
2 celery stalk, chopped small pieces
1 1/2 large onion, chopped small pieces
2.5-3 pounds ground turkey (use at least half dark meat to keep flavor up)
1 1/4 tablespoon all-purpose flour
6-8 tablespoons tomato paste
4-5 generous tablespoons chili powder
1 1/2 tablespoon ground cumin
3 generous teaspoons (packed) dark brown sugar
1 1/2 teaspoon dried Mexican oregano, crushed
Kosher salt and freshly ground black pepper (see measurements below to start with, add more if desired)
little less than one teaspoon ground cinnamon
little more than 1/8 teaspoon ground cloves
4 cups low-salt chicken broth (preferably organic)
One 15 to 16-ounce can white or brown kidney beans rinsed and drained

Simplest Quinoa and Pine Nut Pilaf, recipe follows

Assorted garnishes, such as chopped onion, shredded white Cheddar, chopped tomatoes and/or sour cream

Quinoa and Pine Nut Pilaf:  This won’t look like much pre-cooked but will make a lot.
1 1/4 cups whole grain quinoa (about 7 ounces)
1 3/4 cups low-salt chicken broth (preferably organic)
1/4 teaspoon kosher salt
1/4 teaspoon freshly ground black pepper
1/3 cup chopped fresh cilantro or Italian parsley
1/3 cup pine nuts

Directions

Peal and prep your garlic.  Set aside.

Mix your spices and sugar in a small bowl.  Precision not required.  Set aside.

Now heat the oil in a heavy, large pot over medium-high heat for a few minutes until shiny.

While the oil is heating, quickly prep your carrots, poblanos, celery and onion.  Rough but small cuts are fine.

Add the poblanos, celery and onions to warmed oil pot. Saute until the vegetables soften, 5 to 6 minutes.  Add the garlic.  Stir 1 minute.

Add the turkey and saute until no longer pink, breaking up the turkey with the back of a spoon, about 7 minutes.

Sprinkle the flour over and stir to blend.

Add the tomato paste, and spice/sugar bowl (chili powder, cumin, sugar, oregano, 1 teaspoon salt, 1/2 teaspoon pepper, cinnamon and cloves).

Cook 1 to 2 minutes, stirring to blend.

Add the broth and beans.

Bring to a simmer – 5-10 minutes.

Reduce the heat to medium-low and simmer until the flavors blend and the chili thickens to desired consistency, stirring often, 20 to 30 minutes.

Season with more salt and pepper.

To serve, spoon Simplest Quinoa and Pine Nut Pilaf into deep bowls. Ladle chili over. Serve with garnishes.

Simplest Quinoa and Pine Nut Pilaf **

Place the quinoa in a fine sieve. Rinse under cold running water 1 full minute. Set aside to drain.

Bring the broth, salt and pepper to a boil in heavy, medium saucepan over medium-high heat. Stir in the quinoa. Cover, reduce the heat to medium-low and simmer until the quinoa is tender and all the broth is absorbed, about 15 minutes. Turn off the heat. Let the quinoa stand, still covered, for 10 minutes.

Meanwhile, preheat the oven to 350 degrees F. Scatter pine nuts on a small rimmed baking sheet. Toast the nuts until golden, stirring occasionally, about 5 minutes. Cool on the baking sheet.

Mix the cilantro and pine nuts into the quinoa.

** Dishthistoday Quinoa Note: For me, I did the quinoa in my Zojirushi rice cooker, quick setting – using 1 cup quinoa to 2 cups chicken broth).  I set it in the morning before work and it stayed warm once cooked with very little degradation of taste.  It usually finishes within a half hour so if you are making as the same time as chili get it started before you start the chill.  I also prepped the veges and spices the night before so that when I got home from work putting the dish together took even less time.  If you have never tasted quinoa, don’t be turned off.  It is a grain and when cooked properly tastes great and is relatively healthy for you.  Also to save time I skipped the pine-nuts but I am sure they are a good addition if you have the time.

Read more at: http://www.foodnetwork.com/recipes/giada-de-laurentiis/california-turkey-chili-recipe.print.html?oc=linkback

Indian Shrimp with Coconut Dipping Sauce over a Bed of Quinoa

Finished Dish: Shrimp with Coconut Dipping Sauce over Quinoa

Shrimp with Coconut Sauce over Quinoa

The recipe comes from Modern Spice by Monica Bhide.  Her inspiration for the recipe per her cookbook is from Chef Jose Andres from Washington DC who owns a few restaurants in DC.  It is very easy to make and tastes and smells wonderful.  I added the quinoa, removed the shrimp tails and served over quinoa versus the recipe presented in Bhide’s book.  It is incredibly tasty and not a typical India heavy dish.

This recipe makes enough for 4 small appetizer servings or 2 dinner dishes.  To bulk up the counts increase your shrimp count.  If you multi-task the quinoa, shrimp, and sauce well, this dish can be completed in well under an hour easily and cleanup is painless.  You can use the same large pot to cook the tomatoes, the shrimp, and the sauce.  You only need one cutting board.

Ingredients Coconut Sauce and Shrimp

1 small red onion minced

2 small tomatoes pureed * instructions below

1 13.5 ounce can unsweetened coconut milk

1/2 teaspoon of ground cumin (her recipe called for 1 teaspoon of the actual seeds which I don’t stock in my pantry)

1 teaspoon red chili powder (or less if you prefer less spicy)

1 inch piece fresh ginger peeled and minced (go fresh if you can versus ground ginger spice)

1 tablespoon of Worcestershire sauce

Pinch of sea salt

Cooked 1 pound of nice sized shrimp **

* Puree tomatoes – WikiHow has great instructions on how to do the puree.  I left the seeds and juices in. I stopped after Wiki step 8 because I was just needed simple tomato puree.  You can reuse the pot from the tomato puree step for the recipe later.
Before Puree

After Puree

After a few pulses (above)

http://www.wikihow.com/Make-Tomato-Puree

** For cooking the shrimp, I keep it pretty simple because I want the sauce to be the flavor of the shrimp.

Remove shells, tails, and devein the shrimp (dark brown or black vein) with a sharp knife.

Rinse what you just prepped in cold water and drain.

Fill pot with enough water to cook shrimp; then boil the water on high heat.

Add shrimp and push under water initially, allow the shrimp to cook 1-2 minutes until you see small bubbles to break the surface of the water.  Stop at that point and remove pot from heat.  Shrimp cook quick and should start to have a nice pink tinge (you will need to peak at a shrimp because the water will be murky).  Cover the pot and let the shrimp cook in the hot water off the heat for about 5-10 minutes depending on the size of shrimp.  They will now fully have that nice pink color you are looking for.  Don’t overcook.  Drain the shrimp and set aside.

Prepped Shrimp

Shrimp ready to go off heat

Cooked after staying in warm pot 7 1/2 minutes.

Above 3 shrimp photos – prepped, in the pot on heat with bubbles surfacing, fully cooked

Directions for Coconut Sauce

1) Combine the onion, tomatoes, coconut milk, cumin, chili powder, ginger, pinch of salt, and Worcestershire sauce in a large bowl and mix well.  Add more salt after tasting if desired.

Uncooked Sauce

2) Pour mixture into a large pot and bring to a boil over medium heat.    Begin to prepare your Quinoa ***

Cooked Down Sauce

3) Reduce the heat and simmer for 20 minutes stirring occasionally.

4) Remove from heat and allow to cool at room temperature

5) Process in a blender until smooth – can serve sauce cold or warmed

Blender Pre Blend

Sauce After Blending

After blending thoroughly (immediately above)

*** Preparing Quinoa –  I admit I am spoiled here and use my Zojirushi rice cooker which makes it perfectly with little fuss in less than a half hour.  Rinse one cup of quinoa over a fine mesh strainer and once drained place in rice cooker pot.  Add 2 cups of either water, vege stock, or chicken stock (my preference), add a pinch of sea salt, set on the quick start and wait for it to be done.   As for stove top methods there are tons of options online or follow the instructions on your Quinoa container.   Again for this recipe I keep the quinoa flavor simple because I am counting on the coconut sauce to flavor the shrimp and quinoa.  

Cooked Quinoa

Serve

Layer a plate with quinoa bottom, add shrimp portion, and pour over some sauce.
Shrimp with Coconut Sauce over Quinoa


Slow Cooker Turkey Lasagna – Yes it is possible

I love Barefoot Contessa’s (Ina Garten) Turkey lasagna but it is a lot of work and worse a lot of cleanup.  So when this slow cooker recipe was posted on Williams-Sonoma website a few years ago I was intrigued.  I own and love the Williams-Sonoma’s All-Clad 7-Qt Deluxe Slow Cooker.  It is so versatile. You can brown anything with the insert on top of the stove, and the insert can go into the oven to finish off a dish like this.  This is a serious advantage when it comes to clean up.


So could a lasagna baked in a crock pot have the taste and texture of a typical oven baked lasagna?  My opinion after making this recipe absolutely yes; however, I am not sure the success would be as good in your typical crockpot that does not have a removable insert that can go in the oven.  You also need an above average slow cooker capacity for this recipe.  I think the final broil step on this dish adds a lot to the texture and appearance of the dish.


Could prep and clean-up really be improved versus a typical lasagna without sacrificing taste?  Again I would say yes.  The dish easily peels out of the slow cooker and you are left with two easy to clean bowls (the temporary dirty bowl and the cheese bowl) and a cutting board if you took the time to add the mushrooms and carrrots.


Ingredients:

  • 1 Tbs. olive oil
  • 2 lb. Italian sausage, casings removed  – I use turkey sausage
  • 2 jars (each 24 oz.) tomato sauce – I typically use Wegman’s or Wholefood’s 360 brand to save time but sometimes I use homemade.
  • 2 cups water
  • 1 lb. whole-milk ricotta cheese
  • 2 Tbs. chopped fresh flat-leaf parsley
  • Kosher salt and freshly ground pepper, to taste
  • 18 ruffle-edged lasagna noodles (not no-boil noodles)
  • 1 1/2 lb. mozzarella cheese, grated
  • 2 oz. Parmigiano-Reggiano cheese, finely grated
  • 3 carrots in small diced form (my add in for more nutrition)
  • Small container of your favorite mushrooms, cleaned and chopped in small pieces (my add in for more nutrition)
  • Thinly sliced fresh basil for garnish

Directions:

Prep your carrots and mushrooms if using.

In the stovetop-safe insert of slow cooker over medium heat, warm the olive oil.  Saute the carrots and mushrooms if using for about five to seven minutes until soft.  I usually add the carrots first and halfway through add the mushrooms.  When they look close to done but not quite, add the sausage and cook, breaking up any large chunks with a wooden spoon, until the meat is browned, 10 to 12 minutes. Add the tomato sauce and water and bring to a simmer. Transfer the sauce to a large bowl.

In another bowl, stir together the ricotta, parsley, salt and pepper. Set aside.

Spread a thin layer of the sauce on the bottom of the slow-cooker insert. Cover the sauce with a single layer of uncooked lasagna noodles (about 3), breaking the noodles as needed to fit. The noodles do not need to be perfect.  Spread about 1/3 cup of the ricotta mixture over the noodles. Top with about 2 cups of the sauce, then sprinkle with about 1 cup of the mozzarella and 1/4 cup of the Parmigiano-Reggiano. Repeat the layering 4 more times, starting with the noodles.

Transfer the insert to the slow-cooker base, cover and cook on low according to the manufacturer’s instructions until the noodles are tender and cooked through, about 4 hours (WS recommended time).  My best results have been stopping early at 3 hours 45 minutes to 3 hours 50 minutes.

Position a rack in the center of an oven and preheat to broil.

Transfer the slow-cooker insert to the oven and broil until the cheese is bubbly and golden brown, 6 to 8 minutes (Williams-Sonoma recommended time). DO NOT TAKE YOUR EYE OFF THE PRIZE IN THE BROILER.  FIVE TO SIX MINUTES WILL LIKELY BE PLENTY.  YOU DO NOT WANT TO OVER-BROIL.

Let the lasagna rest for 20 minutes before serving. Garnish with basil and serve immediately. Serves 12.

This dish says it serves 12, I think it can stretch further.   Freeze leftovers in desired portion sizes.  Defrost overnight and rewarm on 325 until warm throughout – 15-20 mins.
 
 
Suggest serve with homemade garlic bread:
1 good French loaf bread sliced in half (horizontal cut)
 
Dice a few cloves of garlic very tiny or do a quick swirl of whole cloves in a mini food processor- saute them for 2-3 minutes on low heat with oil if you have time.
   Or just buy a jar of already crushed garlic to save time and spoon a teaspoon
 
Melt 8 tablespoons of butter.  Add garlic to butter.
 
Using a pastry brush or pouring – put the butter mixture over the bread.
(Sprinkle some parm cheese on top for a nice touch – optional)
 
Place bread on lined alumimum foil sheet pan.   (I have sometimes prep the bread as much as 2-3 hours in advance and covered with foil.  It can get a little soggy if sitting out much longer than that).
 
Broil on high for about 1 1/2 – 3 minutes.  Do not take your eye off the oven.
These can burn quick.   Nothing like piece of fresh garlic bread to go with this lasagna.


Recipe Link
 
Slow Cooker Link
I am not being paid in any to recommend this slow cooker.  I have had it for about 5 years.  I use it often and have been incredibly pleased about every feature.

Fresh Homemade Cherry Pie From Scratch

I am sorry I don’t have a great photo but this pie is worth every bit of effort to make it.  Crust recipe is incredibly forgiving even for a novice.  I got it from a friend of mine and use it for all my pies.  The cherry filling piece of the recipe came from another friend.  Lastly I credit Mark Bittman for general baking instructions.

Double Crust 9-Inch Pie Crust

Will work with a deep dish 9 or low 10 inch

Make in Cuisinart with regular dough blade

Key is to keep all the ingredients cold. Even put the dry ingredients in the freezer for a few minutes before starting…but especially important that the butter and shortening are chilled.   (cut butter and then chill, measure Crisco).  For me keeping cold was about 20-30 minutes.

Crust Ingredients

–       2 1/2 cups unbleached, all-purpose flour, plus more for dusting the work surface

–       1 tsp salt

–       2 tbsp sugar  (will also need a little sugar to sprinkle on top pie crust)

–       1/2 cup vegetable shortening, chilled

–       12 tbsp (1 1/2 sticks) cold, unsalted butter cut into 1/4 inch pieces

–       6-8 tbsp ice water

–       note need a little milk for top of second pie crust

Directions for Pie Crust

Mix dry ingredients in a food processor, then add shortening (about ten seconds). Then cut the butter into the flour mixture until pale yellow, coarse crumbs. Pulse the processor to do this. Then add ice water until dough sticks together. Add little bit of ice water as needed to make dough stick. Divide the dough into two even balls and flatten into 4 inch disks. Wrap in plastic and refrigerate at least an hour (up to two days) before rolling. Roll out on well dusted surface to prepare the crusts.

Ingredients Cherry Filling

–       5 cups pitted cherries (slice the larger ones in half) – try to drain and keep as dry as possible.  William Sonoma sells a Cherrymat Cherry Pitter for $29.95.  I have a seen a similar one for slightly less.  This gadget works incredibly well and if you plan to make this pie a few times a year, suck it up and buy it.  It will save you oodles of time.  Freeze any unneeded cherries and consider making a fruit topping for waffles/pancakes.

–       little less than 3/4th cup sugar

–       1/3 cup flour

–       1 generous tablespoon of cornstarch

–       2 tablespoons of butter cut into small pieces

Directions for Filling

Toss lightly all but the butter

When ready to make pie – preheat oven to 450

1)   Roll out first dough (if from fridge, let sit for 10-15 minutes max) from center out

2)   When close to 10“ check diameter large enough with upset down pie plate

3)   Transfer first crust – fold in quarters, move, then unfold

4)   When dough is in place, press firmly in the bottom, sides and junction of bottom and sides

5)   Trim excess dough to about ½ inch all around, then tuck under edge of plate

6)   Fill the pie with the cherry mixture – little heavier in the center of pie

7)   Dot with the 2 tablespoons of butter throughout.

8)   Place second crust on top of pie dish (using quarter method above)

9)   Trim if necessary

10)  Decorate edges of pie crust with fork

11)  Place pie on a baking sheet and brush top lightly with milk.  This step saves your oven from becoming messy.

12)  Sprinkle with sugar throughout lightly

13)  Use sharp paring knife cut to to three 2 inch long vent holes in top crust for steam escape

14)  Place in oven 450 for 10 minutes, then reduce heat to 350 for 40-50 minutes (mine was ready at 40 minutes exactly).  Pie should be golden brown.  Do not underbake

15)  Cool on rack before serving warm.

 Fresh Whip Cream Ingredients and Directions

–       Put  mixer bowl and whipping beater in freezer for 20-30 minutes

–       1 cup heavy whipping cream (do not pull out of fridge until ready to make)

–       1 tablespoon + of sugar to taste

–       Slowly bring heavy whipping cream (no sugar) up to high speed for a few minutes

–       Before starting to near the consistency of peaks you should add 1 tablespoon of sugar and keep beating

I serve the whip cream on the side versus placing directly on the pie.

Delicious!!!!!!!!!!

Barefoot Contessa’s Crab Strudel – Luxury Appetizer or Entree

When I saw this in Ina’s Garten’s Barefoot Contessa Foolproof, I was attracted to the small number of ingredients, 20 minute prep time, and the ability to freeze the dish and bake-off at a later date.  I was secretly also hoping to get a wow factor from the crowd, and I had success.  The good news indeed the ingredients are easy to find in a store.  The bad news is that 20 minutes of prep is not realistic.  I would say if you are prepping this solo, count on 30-40 minutes unless you are proficient with pastry dough.  In addition you need to plan ahead before making the dish.  The dough needs to defrost for 8 hours or overnight in your fridge.  Then it needs to rest at room temperature for 30-40 minutes before using.  I suggest you gather all your ingredients, then take out the dough, and start your timer and complete your prep work.  The sheets needs to be soft but not too soft.  Yes you might have time to kill waiting for the dough to get just right, but you can always start cleaning up.  Once you start working with the sheets you need to cover the unused sheets with a damp dish cloth (non fluffy type that won’t stick to dough).    Finally my experiment freezing went well but I thought the dish tasted slightly better when baked immediately after prepping vs the frozen but not enough for your guests to likely care.  Her yield says 6-8.  If it is a main entree I think that sounds about right.  But I served a half a recipe for 6 people as an appetizer and it was a perfect quantity.

In terms of difficulty, I upped this to medium because pastry dough is tricky.  However in reality if you just read the box directions and the directions in the recipe, I think it is hard to mess this recipe up.  I used Wegmans Ready to Use Phyllo Pastry Sheets.   http://www.wegmans.com/webapp/wcs/stores/servlet/ProductDisplay?productId=713431&storeId=10052&langId=-1  Our store carried two sizes and I used the larger size but the smaller size would be fine.   My recipe yielded 4 meaty size loaves.  I got the crab at Wegmans too.  The brand was called Graham & Rollins Inc. Crabmeat, Jumbo Lump.  It came in a one pound container and I never saw one shell and the crab tasted great.  Downside is that the container costs close to $30.00.  At Wholefoods it would be significantly more.

Ingredients

12 tablespoons (1 1/2 sticks) unsalted butter, divided   (2 tablespoons + 10 tablespoons)

3 scallions, chopped (use whole of scallion cut into small slices)

2 garlic cloves, minced (I hand diced small)

1 teaspoon curry powder (I think you could add a touch more (extra half teaspoon?) and have a more favorable result.  In the website many wrote in they used Old Bay.  I think that would be fine too but give a different flavor for sure)

1 pound lump crabmeat, drained and picked to remove shells

2 teaspoons fresh flat-leaf parsley, chopped

1 lime, juiced

Kosher salt

1/2 teaspoon freshly ground black pepper

10 sheets phyllo dough (such as Pepperidge Farm) – I used Wegmans brand and 20 sheets (4 rolls, 5 sheets each)

1/4 cup plain dry breadcrumbs – I used a half cup at least and would measure at least that amount out.  (I used Panko style)

Directions

Preheat the oven to 400 degrees F.

Heat 2 tablespoons butter in a medium saute pan, add the scallions and garlic and cook over medium-low heat until the scallions are soft, approximately 5 minutes. Add the curry powder (or old bay) and stir.

Shred the crabmeat into a bowl and mix with the parsley, lime juice, salt, to taste, and pepper.   She then says add the crabmeat to the scallion mixture.  I found it easier to add the scallion mixture to the crabmeat bowl.

Melt 10 tablespoons of butter in a small pan and set aside.

TIP:COVER YOUR DOUGH WITH WET CLOTH WHILE YOU PAINT WITH BUTTER AND SPRINKLE CRUMBS – CAREFULLY MOVE THE SHEETS TO YOUR WORKSPACE

Unfold 1 sheet of the phyllo dough. Brush the sheet with melted butter and sprinkle with bread crumbs.  (My sprinkles caused me to end up using 1/2 cup total).   Repeat the process by laying a second sheet of phyllo dough over the first sheet, brush it with melted butter and sprinkle with bread crumbs until 5 sheets have been used. Spoon a 1-inch wide row of the crab mixture along 1 edge of the phyllo dough. Roll it up. Brush the top with butter and set aside. Repeat the entire process using the all the phyllo dough and crab filling.

Cover a sheet pan with parchment paper. Score the crab strudel diagonally into 1 1/2-inch pieces and bake for 12 minutes, or until the top is lightly brown. Slice and serve.

If you are using a previously made batch from the freezer I had success pulling it out of the freezer 1 hour before cooking and resting at room temperature.  I remelted some butter and painted the tops again before baking.  Make sure your score marks are deep enough if you are using previously frozen dough so you get a good chance at the crab evenly warming.  At the same time, you don’t want to score all the way through or the dish will fall apart.   I had to bake closer to 18 minutes on the frozen logs.  The straight to the oven pieces needed 12 minutes max.

Read more at: http://www.foodnetwork.com/recipes/crab-strudel-recipe.print.html?oc=linkback

Below are pictures just before going into the oven and as it came out as well as the crab mixture.

IMG_4825

Image

Image